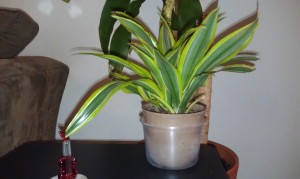
This is a matured mango tree. It’s not mine, though – I found this one using Google Images. It’s on sale for $459… I’d rather grow my own than trust a business furniture supply store, plus it’s more satisfying seeing it all the way through from the beginning.
In this post, I’m going to discuss how to grow a mango tree indoors from a seed. I haven’t done this since high school (which was a while ago), and I did get a pretty decent one started – it never bore fruit, though. Hopefully this project will yield a delicious product!
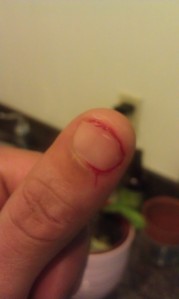
Eight seconds after a small cut to the thumb… Annoying, but not painful. This was done while shaving the flesh off of the mango seed after eating the fruit.
Let me start by saying that you should definitely be careful when you’re doing anything with sharp objects. As I type these sentences, I’m trying to get the blood to stop pouring out of my thumb, and it seems as if I’m fresh out of bandages… Yes. That’s right – I managed to slightly injure myself during the making of this post, so be sure to follow my blog – I BLED REAL BLOOD TO BRING YOU PEOPLE THIS POST!! LITERALLY!!
With that said, I’ll try to avoid stating the obvious for the rest of this post, but I can almost guarantee you – obvious will be stated! …it’s what I do.
As with all of my other projects, I went ahead beforehand and did some research. I’ve done this in the past, as mentioned before, but I wanted to see if there were other ways of going about growing a successful mango tree in the comfort of your own home. I found a few very useful videos and articles on the subject, and they all use slightly different methods. I decided that I’m going to use the method that I used before, which doesn’t involve germinating the mango seed in water prior to planting. I’m going to go over this method with you step by step right here in this post. It’s just going to take me a little longer to finish because this annoying cut is starting to bleed again… I actually had to take the mango seed and set it aside wrapped in a wet paper towel until I’m ready to finish up… ugh. The things I do to stay in tune with the rest of the world…

I’m gonna cut you. I’m gonna cut you, then eat you. When I’m done eating you, I’m gonna do science with your insides…
The first thing I did in preparation for this project was to clean my work area. After that step was completed, I grabbed my knife and mango (which came from the local Co-op), and informed the mango of my intentions. I don’t know why I like to talk to things that don’t answer, but I do – so deal with it. This mango is of the Tommy Atkins variety. It’s not the King Kong of mangoes, but I think they’re delicious. And they’re readily available in my area this time of year.

You can clearly see the PLU and other information right on this little sticker. It helps to keep track of where your plant actually originated if you need to do further research. Or provide information to an inquisitive admirer .
Oh – also, before I did any of this, I took the stickers off of the mango (which give the PLU code) and put them onto the pot that I’m using to grow it. Usually fruit will only come with one sticker, but sometimes you’ll see more than that. Use them to your advantage, people! I found a really informative Wikipedia article on PLU codes, by the way – you can see it here.

This is the date. Note it.
I also use a sharpie to etch the date “of creation” on the underside of the planter. I use the underside so as not to take away from the overall beauty of what I’m doing here. I don’t have the greatest memory, so being able to properly determine or deliver the age of my mango tree(s) years from now will be damn near impossible for me without this little step. I use it for me and my needs – you don’t have to do this at all… as a matter of fact, you don’t have to do any of this, but you’re still here – so bear with me.

Simple Miracle Gro® potting soil
A final distraction to the topic at hand – it may or may not make a difference to you, but I thought it would be a good idea to bring it up. The type of soil (growing medium) that I’m using for this project is simple miracle grow potting mix. It works great, and was purchased for pretty cheap at a local store. We’re in the winter months here in New England, so stores in my area tend to take this type of product off the shelves to make room for seasonal inventory. I bought two bags earlier today, and they only cost me $3.99 each. This product offers a great mixture of wonderfulness – perlite, fertilizer, sphagnum peat moss, compost, and a wetting agent of some sort.. This mixture is absolutely perfect for what I’m trying to do with my mango seed.

Decisions… Decisions. To eat or not to eat? Of course I’m gonna eat it!
Now that all that nonsense is out of the way, lets get started! I think my thumb is up for the finish, seeing as how the bleeding has finally stopped and I can type with both hands. I really can’t stress enough how important safety is if you happen to be an individual that values your health and appearance. In other words, BE CAREFUL WITH YOUR KNIVES!!

I’m thinking that this is the type of behavior that got my thumb sliced open in the first place..
Okay – now for the “work” part of my project. After remembering that I’ve already briefed this mango on events to come, I went right to work. I started by taking my knife and somewhat carefully cutting it the long way all the way around, rocking the blade against the seed inside. I didn’t have to worry about damaging the seed like I do with an avocado – the seed inside of a mango has a protective outer shell, and it’s going to have to be removed in a later stage anyway to get to the prize inside. Mangoes tend to be difficult to deal with at this point, mostly because of their fleshiness – the fruit is fused onto the outer shell of the seed itself. This particular mango didn’t want to give me access to it’s seed without a fight, so I ended up peeling it and eating the whole thing, making a huge fruit-flesh and juice mess of my work area. It was completely worth it, though. I love everything about mangoes, except for the fact that I have no choice but to immediately floss after eating one. I hate flossing.

I don’t really eat like this… Nevermind. Don’t judge me.
After intimidating, cutting, wrestling with, eating, enjoying, and cleaning up the messiness of my mango, I was ready for the next few steps. These steps result in extracting the inner seed from it’s outer shell. There are a few ways that this can be done, but just for the sake of showing you what the outer shell looks like for future reference (if you ever should need it), I’m not going to attempt to just bumrush my way into the seed with the slippery mango flesh still attached to it. That’s too damn dangerous, and I happen to be truly accident prone. To make matters even worse, I’m frustrated beyond belief because I have mango fibers in between my teeth. One of the most uncomfortable things in life for me… Y’know… A pet peeve. Yeah we all have those.

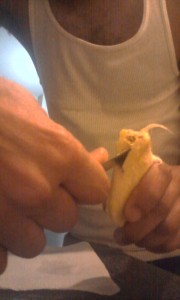
I’m removing the fruity flesh from the outer portion of the seed. What you see pictured here isn’t enough – I had to use that knife to shave it!
I’m using cool running water and a sharp paring knife to remove most of the flesh from the outer part of the seed. This is kind of risky because you’re dealing with a knife, so be sure to exercise what most refer to as caution! …and on that note, I’m bleeding again. Damn. This is exactly why you don’t want to be a careless nut while you’re doing this (if you are doing this) – You don’t want to bleed all over your seed like I did. Trust me. It’s messy.

Look at it, dammit. There’s important information afoot!
Once you have the outer shell clean (for the most part) you’ll have something that looks like what you see in the picture. Examine this mango seed for a minute – if you don’t heed this warning, you may set yourself up for failure if you’re trying to grow a mango tree yourself. Notice where my finger is pointing. This is the area that the root and stem will be coming from once the seed starts growing. This is the only plant that I’ve ever dealt with that has a root and stem coming from the same section of the seed. There are more out there, but I haven’t had that experience as of yet. You do not want to attempt to open the outer shell from where I’m pointing. Instead, start at about an inch or so above it… lot safer there.
Be careful here. I’m actually using the paring knife to pierce the outer shell, but I finished the job with a butter knife. The butter knife alone will do the whole job with no problem!
Don’t use a sharp knife for this step. I used a butter knife to pry it open, and I suggest you do too. The reason behind this is that you want to avoid damaging the seed that is inside of this shell. That seed is the whole reason you’ve bothered to read up to this point, am I right? Of course I am.
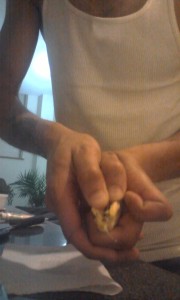
Prying open the protective outer shell of the mango seed by hand
Carefully pry that outer shell open once you’ve penetrated it by twisting your butter knife back and forth. Once you have an opening sufficient enough, use your hands to finish opening the outer shell of the mango seed. This is done pretty easily, and will (almost) ensure that you don’t do any damage to the seed itself. It’s almost time to congratulate yourself on a job well done – you’re almost there!

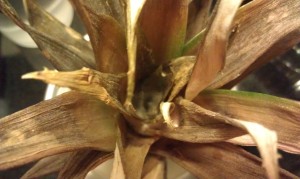
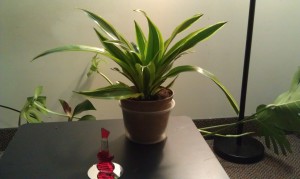
This one isn’t as attractive as the last one I planted, but it looks like it may have a chance at life. And making me a happy camper in the future.
Once you manage to open the outer shell and remove the actual seed of the mango itself, you have a few options. This is the point in the process where growers will debate and disagree about what should be done next. Personally, I don’t have a true opinion, because I’ve only planted a mango tree from seed twice before this post. One yesterday, and one (like I stated earlier) back in high school. I’m going to use the method that worked for me before, and I’m hopeful that it will work for me this go-round. The method that I used in the past didn’t involve germinating (propagation) in water – It’s all dirt from this point for me!!
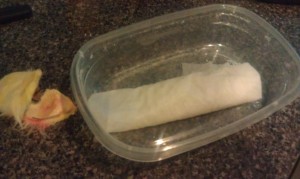
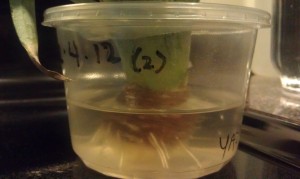
Wrapped in paper towel, and heavily moistened with water. I leave my water out in a pitcher overnight to let the chlorine evaporate. I do this out of habit. See the red in the outer shell? That’s my blood!
Of course, some of us won’t have the necessary resources available at the time of consuming a mango and having the thought to grow the seed, and that’s alright – you also have the option of either going ahead and germinating in water or doing the same thing that I did for this particular project. Since I cut my thumb, and was bleeding too badly to finish right away, I wrapped my seed in a paper towel and poured water over it – just enough to get it nice and wet but not overly saturated. The seed will stay fresh like this for a small amount of time, and in this case, enough time for me to stop bleeding and finish up, finally allowing me to get some sleep for the night.
As if you care.
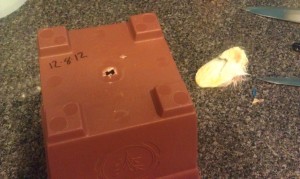
This planter didn’t come with a hole at the bottom for drainage, so I made one.
Now that we have the seed from our mango ready to go, it’s time to get dirty! Remember the photo of the underside of the planter from earlier in this post? Well if you were paying close attention, you would have noticed it was void of a drainage system of any sort. I had to fix this, and it was softened in the middle just for that purpose! And yes – I used the paring knife again to do it. Never scared. If you look at the photo above, you’ll see the size of the hole I made. That’s all that’s really necessary to make sure your tree isn’t destined for root rot.

lightly compress the dirt before you place your seed!
Now that my planter is ready, I will grab my potting mix and fill it up about 3/4 of the way, taking into account that I’m only filling it (the planter) to about an inch and a half below the top with the mix once I’m all done. After this I feel it’s a good idea to lightly press on the soil to compact it so it doesn’t settle on itself in the final stages once you water it.
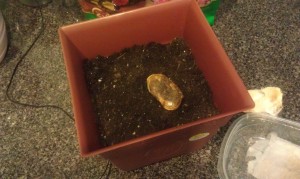
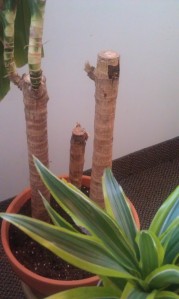
The last time you want to see this particular seed.
Place your seed off-center on top of the potting mix on it’s side. You don’t want to place it directly in the center, because you want the plant itself to break dirt as close to the center of the pot as possible. You just do – it will allow the root system to develop in an efficient manner. In other words, this is how I’m maximizing my effort. Stay with me!

I ended up adding just a little more of the potting mix right after taking this photo.. Watering will cause it to settle anyway. I almost forgot about that. I miss science class…
Time for some more dirt! You want to cover the mango seed lightly with just under two inches of the potting mix. This layer is on top of the seed, so I wouldn’t suggest compressing at this stage – once you water it, it will settle anyway to about an inch over the mango seed. titty sprinkles. Just wanted to see if you were paying attention. Anywho…

Last but definitely not least
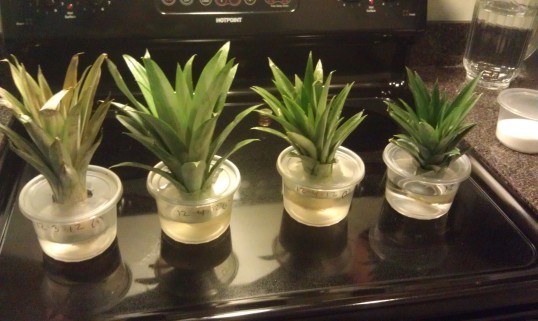
This potting mix holds moisture pretty well. It says it does on the package, and I happen to know that they’re not kidding. Thoroughly water the soil – I’m using water that I left out overnight to allow the chlorine to evaporate. I can’t help but to do it… It’s like a nervous tick. As you can see, I used plastic wrap to cover the planter once I watered the “dirt” , and like YouTube user Praxxus55712 said “It’ll make an “ecosystem” of some sort”.. Excellent. There. We’re all done, and you can put this little sucker anywhere you want to around the house. I’ll update you when progress is made! Stay tuned!